Showing posts with label Projects. Show all posts

Sunday, October 18, 2020

Pandmic Projects 4: Terrain Making and Casting

 I've had a few terrain projects dangling near-finished for a while, but I lacked the motivation to get the over the finish line.  some like gun position has been sitting around needing to be grassed for 9 months. others like the walls have only been sitting idle for 2 or 3 months. then there is the bridge, which I bought at HotLead(I think?) in Ontario 6 years ago, before i moved to Edmonton.either way i decided i needed to get some  finished.


The bridge was a great find.  I bought it at the HotLead fleamarket 6 or 7 years ago, broken in two.  I knew I could pin it and fix it, and more importantly, it fits 50x50mm bases perfectly! it also happens to fit my river system well.  it also painted up really nice.

It had broken right at the middle point to the side of the central arch stone. I pined it in 4 places for extra strength.

Side shot of bridge
 

50x50mm bases fit perfectly!

 Next is gun position. I built this a year ago as a test bed for some techniques in making wood texture. it was a general success. I used Renedra wattle fencing and gabions, but I intent to make my own for future projects.  in the future I'll probably also make the walls higher. they came out a little lower then I'd want.

The texture on hte wood planks was created by "scrubbing" the wood with a wire brush. The wood used was basswood.

Position occupied by Napoleonic British guns

Lower angle to show the height of the position walls.

Reverse angle. Note the texture on the planks.


This wall project started both because I wanted some more walls, but also because I wanted to try my hand at casting in 2-part self-skinning polyurethane expanding foam.  i started by making some dry stone walls. I had to modify how i cast them, but they ended up working ok.  there are some bubbles because I don't have a vacuum chamber I can't really do much about it. Note on the drystone walls the moss/vines on the walls furthest from the camera. I did that to cover up places where walls were damaged coming out of the mold the first few times. the skin would separate from the foam. I managed to solve the issue after a few castings.  Each wall section is 6 inches long. for this set, i have a single straight wall, one with a gate, and one with a corner on the end like the old GW stone walls.


the 3 unique lengths of wall.

A three sided paddock defended by the Buffs

From a lower angle so you can see the height


The second set of walls is more of an attempt to replace my old GW fantasy stone walls. you can't get them anymore, and they are slowly breaking.  I built these out of individual styrofoam blocks textured with a foil ball. the blocks are on average under half the size of the massive 200lb blocks the GW ones are apparently made out of. I also varied the block size a bit more. So there are some that are very small and some that are almost the size of the GW ones, near the bottom usually.  I built two unique straight sections, one section with a corner, and one with a gateway/opening. I've seen these style of opening in several pictures of similar style old stone walls.

These cast nicer then the dry stone walls. I thin there are less extreme changes in topograghy for air to get stuck in. there are still air bubbles but they are generally less noticeable.

the four unique sections of wall

Three of the master walls shown with a GW
Fantasy stone wall for comparison

From a lower angle so you can see the height


And finally, a well I bought on Friday this well is from the Wizkids "Deep Cuts" line of scatter terrain and accessories.  They are cheap ($6.95 CDN, or about $5 USD) and are full of detail. This one came with a little water insert that pops out easily.  good 28mm wells aren't easy to find so I'm glad I got this one for really cheap.


Deep Cuts well with water insert out

Well with water insert in


As some of you might have noticed, I'm trying to update once every week or two now. we'll see how long that lasts.  being unemployed certainly makes finding the time a bit easier.  Its also nice to have some Motivation to paint. The lack of historical gamers in Edmonton combined with lack of gaming during the pandemic had certainly taken its toll.

Cheers!

Monday, May 23, 2016

Making a Mat Part 2

So today I knocked the flock off the mat.  I decided I should really spray down the mat with Dollar store Extra Hold hair spray.  It's a fairly common cheap way of keeping the grass on a large scenic base or, in this case, mat.  The down side is that 2 hours after spraying the entire thing down, my basement still smells of hairspray...

Anyway, so here are the picks taken after I banged off the flock and sprayed it down with cheap hairspray.


Close up of a denser area of Grass

Close up of a Sparser area of Grass


 Then I set up a bit of a table for Napoleonics, to see how it looks. I think it turned out pretty well. here are some pics.


I'm satisfied with out it turned out.

 Someone on commenting yesterday's post mentioned ironing the cloth before hand. I wish I had thought of that before  beginning, as either are 1 or 2 places where the sheet was folded  that are visible.

In the future if I make another one, I think I'll stay away from the drop cloths. they have thick seams tunning down the middle where they joined 2 pieces.  these were a bit hard to hide.  I figure that if I time it right I can get a piece of 5 foot wide canvas (or similar material) that has no seams and requires no ironing for maybe $10-ish  more.

so that is one more project out of the way. I look forward to getting a few guys over for a game!


Sunday, May 22, 2016

Making a Terrain Mat

Since I moved to Edmonton last fall, I haven't done much Historical gaming.  Part of this is the group that is here, but part of it was also a combination of my looking to do something different.  However, my favourite period is Napoleonics, and I like big games.  I had the table space but  I did not have a larege enough game mat to  play a big Napoleonic game.

I set out to make myself a 12x5' game mat to host big napoleonics on.  my biggest hurdle was getting the scenic grass i wanted.  I Picked up a shaker of Scenic Express EX881 Summer Grass blend  "flock and Turf"  last spring while i was at Cold Wars .  the stuff is a mixture of coarseness's   of flock and turf  but the green is a nice bright green like the original GW Static grass.   it's really nice looking. 

the problem with scenic Express Products is they are not distributed in Canada, nor does scenic express apparently ship here either.  while searching the internet i found a website called Model Train Stuff  which sells scenic express Products.   I ordered 4 "Eco"bags of 48oz grass.  their estimated shipping time was 2+ weeks, but it arrived in less then 10 days!  The service was good, they let me know when it shipped and provided a tracking number.  I'll definitely consider buying stuff from them again.

anyway, I also bought myself a new Phone, which i used to take the pics of the mat making process. but before I began I wanted to test it's usefulness at taking pictures of miniatures, so i stepped over to my display case and took a single shot of my small ECW collection, and this was the result (of one try only). I was quite satisfied.


The earl of Essex and company. all Warlord Games figures.


anyway, on to hte mat making.  I decided to go with a process i have raed about of several blogs and post on The Miniatures Page.  you take a peice of cloth (in this case a Canvas Dropcloth form home Depot) and coat it with a combination of Acrylic Caulk with latex, Latex paint, and some sand.  then before it dries you cover it in teh flock/grass and pat it down.

Here is a lsit of everything i used:

4x48 oz  Scenic Express "Flock and Turf" Summer Grass Blend (plus shaker I had around, $60)
12x 300ml DAP Alex caulk( a contractor pack, $25)
1x 1 gallon of CIL flat brown paint( $30)
1x Everbilt 12x9' canvas Dropcloth($36)
1x 5 gallon orange Home Depot Bucket.($4)
4x handfuls of concrete sand
1x random piece of plastic from  window blinds i found in the back room(to stir, Free)


Total cost in Materials was $155 CDN.

I did not include the sand because i didn't use much (4 handfuls?)  and it's from a 10KG bag of concrete sand i bought like 8 years ago for another project.  but a bag of the sand will run you about 10-15 bucks.

I doubt you could by a 12x5 mat for that price.

Matierials

first i laid out the dropcloth on my table, and cut it down to a little over 5 feet wide.  the Cloth is actually  about 3 inches short of 12 feet.


Cloth laid out and cut to size

Next I grabbed my caulking Gun and squeezed all 12 caulking tubes into the bucket.
Empty caulking tubes(right) and their former contents(left)

I then added a little less tehn half a gallon of the Brown paint and started Mixing.  I added 4 hand fulls of sand, one at a time, after teh caulking and paint ad been thoroughly mixed.

Mixed caulking, paint and sand.

Using a pair of Latex Gloves, i  spread the mixture over the dropcloth by hand. if you put it on too thin you see the texture of the canvas.  but it doesn't need to be really thick either. the dropcloth had some seams in it is i made it thicker around those to help hid them.

Mat partially grassed.

I then began sprinkling the grass on the mat by hand.  I didn't want full coverage, but at the same time i don't want a lot of the caulk and sand to show through, since it won't be dry brushed or have any depth. but you still want some showing through.

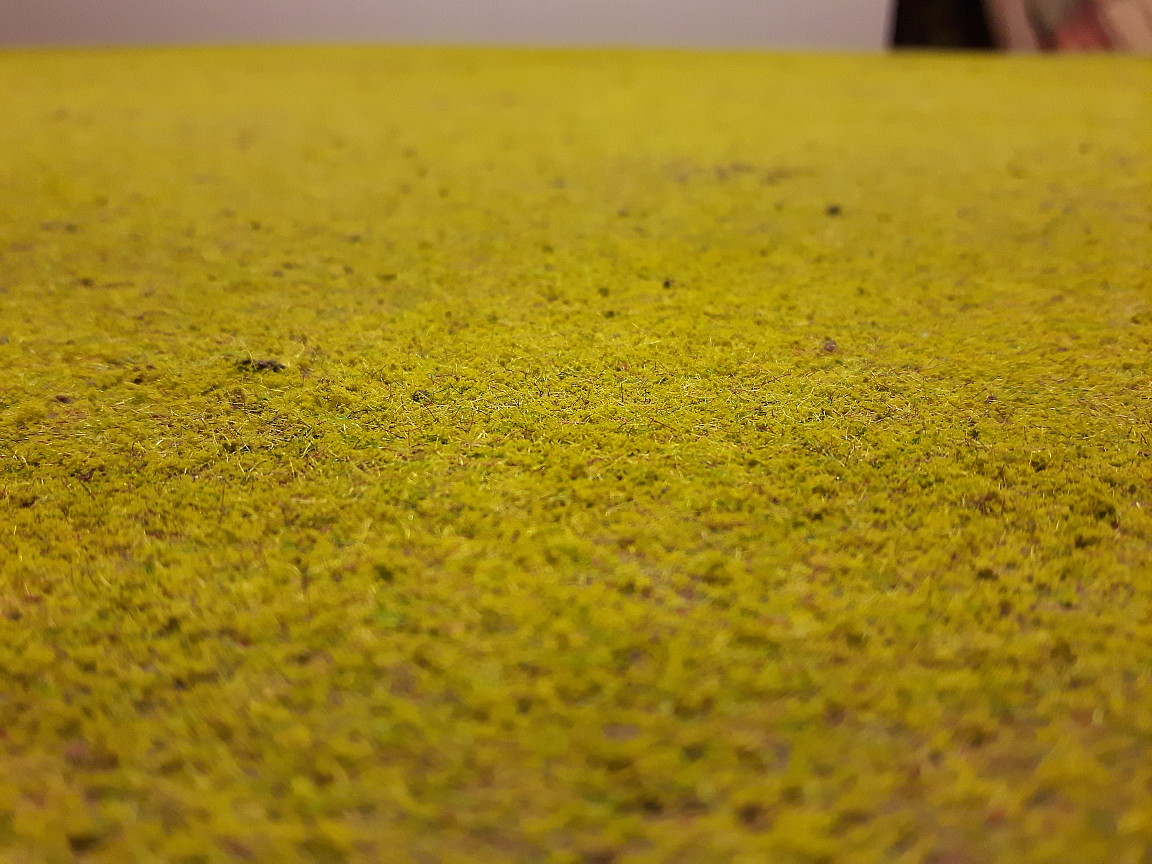
the Mat fully grassed


the total time from laying out the cloth to finishing the grassing was about 2.5 hours.

I'm pretty pleased with the results so-far.  The mat is still drying as i write this, so I'll post again when the mat is dry and i can get some closeups of the final result.


Friday, March 7, 2014

Rivers part 3: Finished

tuesday a applied the  super-thick gloss Gel medium to the rivers. the gel dries faster then I anticipated, but in thicker areas, it takes up to 3 days to go completely transparent. most of it however took a mere 12 hours to dry.

last night a took some pictures of the finished rivers.

Birds Eye View of rover set up on table

River from a more reasonable angle, with a figure from last
years Convention game last-minute painting marathon

close-up of river surface
I also laid it out on my living room floor to confirm I had enough for my convention game.  Despite all the twists and turns, when all was laid and done, I had an extra 3 feet.

I'm keen to do some ponds and such, although I think I'll use the regular thickness  Gel medium when i do.

I still have 3 groups of things to do over the next few weeks.  i nee to paint my Russian artillery,  make a few more field s with removable inner areas, and i need to finish up the current batch of commissioned pulp figures. i have 2 weeks. that should be more then enough time...

Tuesday, March 4, 2014

Wading into Rivers Pt 2

Today I continued my river project buy painting the sand and then painting the river. the process is so far on track, and i am pleased with the results.


River banks have been painted and dry brushed

after the river has been painted.

the river consists of 16 feet of river including 2  fords and a T section.   on top of that there are 2 90 degree sections, 2 45 degree section 2 30 degree small wedges and 3 larger 30 degree sections.

the next step is to apply the the gloss acrylic gel medium. with this i will add small ripples and such to give the river a final texture and gloss. after that has dried i can flock the river and pack it into a box for transportation on sunday.

the acrylic medium will take a few days to dry so I'll post again then.

Monday, March 3, 2014

Wading in to rivers. Pt 1

At the end of the month I'm off to Hotlead , a convention in Stratford, Ontario.  I'll be running a  large napoleonic game on a 12x5' table, using a heavily modified version of Field of Battle(1.0). I've removed what i saw as the greatest flaws in the system(such as extreme randomness), while retaining the things I feel make it great, one of which is the card system.


anyway, I realized for the specific scenario I picked, i need roughly 17 feet of rivers. now I have been thinking of  making a modular river system to go with the teddy bear fur mat I have made(I want to make another without integral roads, but have been somewhat stymied by finding a source with a big enough piece for a reasonable price).  I was having some trouble deciding how to make the actual river, as i have many times over the last 20 years.  then I saw a video on youtube which i no longer seem able to find. it displayed a number of ways to get a water effect, including using acrylic medium gel.  so I decided to get it done, and set about maing 17 feet of rivers plus curved sections.

I laid out 2 pieces of 2x2' MDF, and 1  1x1' piece of MDG, and started drawing.  i decided in a common base width and a river width, and started measuring and drawing.  I made sure all the joints have the same distances of base edge-to-bank and  bank-to-bank distances the same across all pieces. I then cut all the pieces out Saturday afternoon.

river cut up into 2foot sections.  only 3 of these were left this long.

other smaller and curved sections
Sunday afternoon/evening(it took longer then I had anticipated) I  began building up the banks with LePage interior/exterior pigmentless wood filler.  then this afternoon I began gluing sand down to all the banks. took about 2 hours today, finishing up right around 8pm.

 
River sections, all with wood filler applied, and all but 2 with sand glued down.

Later tonight I will do some painting of the banks, and tomorrow I'll paint the river, and maybe start applying the acrylic medium gel. depending on how heavy a coat I apply, it can take up to 4 or 5 days to completely dry.  I'm not planning on applying a thick coat, but I have another playtest this coming weekend, so I'm trying to leave enough time for a full cure.  although it will by dry to the touch in 24 hours no matter what.


Some people think I'm nuts for running a game at a con and to still be painting figures for the game this late in the game.  but I've made a habit out of it.  this time last year I still had only just finished  my teddy bear game mat for my Napoleonic Peninsular war Skirmish game at Hotlead.  and I had not yet finished painting all the forces.  last year I was playtesting the last 2 weeks and modifying the order of battle up until 2 days before the convention.  that's just how I roll!

More progress on the rivers to come!

*EDIT*  found the video i used on youtube. the bloke who made it posted on TMP which is how i found it again.  Link .

Sunday, September 23, 2012

New movement trays

About a month ago a friend and fellow miniature gamer from my World of Tanks clan(I'm a Deputy commander in the [CARD]1st Canadian Armoured Reconnaissance Division)  put me in touch with one of his friends.  this guy has a laser cutter, and does custom stuff for his local gaming scene.  I should probably also mention that both of these guys live in the US, and I live in Canada. I only mention that because I find many times, in situations like these, some  Americans don't like shipping internationally.

I was looking to get some pieces cut to make movement trays for my skirmish cavalry(which are on GF9 pill bases).  so i discussed the idea with him and he game up with what you see here.

Finished trays with a pair of laser cut bits as-is.

I put together an order with 3 other guys. I bought 40, and between the other 3 guns there was another 80 added.  WE picked the order up form a US PO box just over the boarder last week, and i finished off 3 by mounting them on 1.5mm(1/16") plastic.  The pill bases fit perfectly.  I'm very pleased with the final product.

In other news,  after 2 months of waiting my local hobby store(not the Local gaming store, the actual model/RC/train store) finally got in my order of O scale   Spanish roof tile.  So now I can get going on the rest of my Spanish village.  I can't yet finish the Spanish church, but the grave stones will be ordered next time J & M miniatures puts in an order to Renedra.

Friday, June 25, 2010

Rock Outcroppings Finally Finished!

Well  I finally managed to finish off the first 3 of my rock outcroppings. they tuend out pretty good i think, especially for a first try. 

The trees I used were a mixture of things. the tall darker  coniferous trees are Bachmann trees. I really like their pine and spruce trees. Best of all,  for 11 bucks you get 8x 3-4" trees, or 3x 5-6" trees. the other coniferous were whatever I could scrounge up. There are 3  cake ornament trees, and the rest of them are the cheap bottle brush variety you see at Christmas, with some flocking added.  The deciduous trees on the 2 smaller formations are some "dead tree" plastic armatures from an old Siege board game that my friend Derek Watson gave me.  Normally they are decidedly two dimensional, but I used my heat gun and bent them around a bit. The foliage is Heavy duty stripping pad, torn up and stuck to the armature with hot glue.  learning to use this stuff to make trees will come in very handy for doing bushes and hedges with the same stuff in the future.
Perry Miniatures AWI Indians pictured 
on the largest outcropping

I have the other 5 outcroppings  treed-up and ready to flock. I'm hopping to finish them off today.
Conquest Miniatures Compagnies Franches de la 
Marine on 2 smaller outcroppings

Also, Thursday morning a shipment of Eureka French & Indian war colonial infantry arrived, so expect to see them kicking around the blog some time this weekend.


Wednesday, June 23, 2010

Rock Outcropings Revisited

Well it's been a week and a half since i last posted about the Rock outcroppings i was building out of Ceiling tiles.  initially this went quite well.  Unfortuantely, i did not have speciufic details on how to mix the carpenter's glue, water, and Durabond 90.

For starters, Durabond 90 does not mix properly with Carpenters glue(it does however with white glue). I had to mix it with the water before adding the glue.  after 2 coats of this mixture i found out that when you reach a certain amount of Durabond 90 in a carpenters glue-water mixture, it gels after about 10 minutes, and there is little way to slow the gelling process.

After that i switched to white glue, and all the problems ceased. you can mix in a ton of Durabond 90 without having to worry about it solidifying rapidly.  for the last 2 coats i mixed in a bit of gray paint. in between htese last 2 coats i left  the peices for about 24 hours in between coats.

The pics here show the outcroppings glued to MDF bases, partially painted, and with trees leaned up against them were I intend to glue them down.  I'm intending to glue some flock mix randomly around  outcroppings, and I have some clump foliage to spread around them too.  I'm planning to have these finished by Friday.

Monday, June 14, 2010

New Terrain project

Lately Ive been feeling my FIW terrain, seen Here in the background, was lacking something. The collection was too dependent on trees. Just trees. Oodles of trees. then 2 weeks ago, Dave Hoyt of Much Ado About Nothing fame posted some pics of his WW2 early war French Collection.. One such picture was of some rock outcroppings he bought for his collection a few years ago.  When I saw these I immediately knew these would spruce up my FIW terrain.  Problem is I'm on a tight budge right now, and the original maker no longer makes them

Licukily I happen to know the guy who made these, ModelMakerChris.   Chris makes some of the most beautiful terrain you have ever seen.  most of my desert village collection was built by Chris.

Anyway, I know that these were something stacked, I just didn't know what he used. So I emailed chris on the off chance that he would let loose the secret of these pieces. Lucky for me he did: ceiling tiles.  Then, this weekend, Dave lent me one of his rock outcroppings.  Dave and I frequently game together at MIGS, so he knows he'll get it back in decent time, and good condition.

So this evening i went down to the MIGS clubhouse in Hamilton, Ontario.  MMIGS has 16 4x6 tables that are the perfect hieght for miniature gaming. They are also the perfect height for working on terrain while standing. Also, during the week nothing happens at MIGS, so it's the perfect place  to work on large-ish terrain projects that can be completed and cleaned up after in a week.
Before: ceiling tiles(

During construction( figures shown for scale
purposes are 3 of my 28mm Front rank 
Bavarians, converted to Baden,  on a 60mm 
round base)


After. One of Dave Hoyt's ModelMakerChris' Finished 
products used as a template for finishing


And as usual, with any project, I went a little overboard.  I decided I want at least one huge rocky outcropping for my FIW.  this one is 18 inches long, 8 inches at its widest, and 3.5 inches high.  it has 2 ways to climb it, at either end,  an alcove with an overhang, and a perfect position for ambushing fire. I'm going to build at least 1 more outcropping of similar size.


I've only used up about Half my materials, so there will be a lot of these floating around the club.


If anyone is ever in the Hamilton area and would like to come down for a game, or a terrain workshop, post a comment and let me know. I'm finding myself with a lot of spare time lately(obviously), and I'm always up for gaming etc. with new people.

Friday, May 28, 2010

Introductions & a current modeling project

Good day,

Recently, Ive been reading quite a few blogs of fellow wargamers, and have decided to give it a try myself.

I normally have 2-3 wargaming projects on the go. At the moment, I am Focusing on both 28mm French and Indian war Skirmish, and 28mm Eastern Renaissance Polish Skirmish.

This week I began building an Native American palisade to protect my 3 longhouses from marauding British & Colonial raiding parties. I have never seen anything like this in a wargaming, so i thought it would be a unique addition to my FIW terrain collection. It will also be a great a centerpiece for a convention game.

Unlike European style Palisades, Native Americans build theirs in rough rings around their settlements. They didn't have gates like we are used to seeing, they instead had narrow entry ways. Native Americans also did not use walkways along the walls. instead they used platforms built on scaffolding. I've decided on the the simple layout seen here, on a 24" square piece of MDF. I have not decided where to put the scaffolding in, but that will be the last step before I sand and flock the whole base. In the dead space I will be putting in small fields as the Native Americans often had small crops of corn and other staple foods inside the walls.

Initially i was going to have to buy all the 3/16"doweling for the project from Micheal's in bags of 20 12" lengths for $3.99, but i stumbled upon nearly the same bags of Doweling at a local Dollar store for $1! Since i needed 7 bags to complete the project, this discovery drastically reduced the Final price tag. I will need to cut each 12" length in 3 equal lengths of 4" ( give or take 1/16th")

The project will take several weeks, mostly because I have to shape each 4" lengths of doweling. So far, I have 14" of wall completed, of a total outer circumference of about 75"