I got in a quick game of Napoleonic Black powder today with the owner of the Austrians I'm just finishing up.
we play with the ranges from the book halved(due to smaller table) and it still gives a good fast game with a turn or 2 of maneuver. we do however leave the command ranges at 12" because of the way the figure are based.this allows brigades to be spaced out a bit. we also allow the Overall commander(in this case divisional commander) to give orders to any unit that has not successfully been given orders(unless they were part of a blunder).
we also decided that disordering was too penalizing for us and we made is so that re-ordering a unit takes 1 move segment, instead of all turn. this change. if you roll 1 move, the result is the same as the rule as-written, but if you get more moves, you still get to do something. this also allows elite units to still use their rule special rule.
for skirmishers, we make them roll a 4+ to evade infantry, and a 5+ to evade cavalry. they get only 2 dice for shooting and 4 dice for hand to hand, but they retain thier +1 to hit modifier.
Of course, as usual, i forgot to take pictures until the end of turn 3. then i took another set of pictures when the Austrian division broke half way through turn 5.
The forces were my Baden division versus a division of Austrians.
Baden:
Division Commander- 8
1st Brigade - Cmd 8
1st Battalion, 1st Baden infantry
2nd Battalion, 1st Baden infantry
1st Battalion, 2nd Baden infantry
2nd Battalion, 2nd Baden infantry
Foot Artillery battery(2 guns)
2nd Brigade - Cmd 7
1st Battalion, 3rd Baden infantry
2nd Battalion, 3rd Baden infantry
Light infantry battalion(skirmish)
Foot Artillery battery(2 guns)
Cavalry Brigade - Cmd 8
1st/2nd sqdns, Baden Dragoons
3rd/4th sqdns, Baden Dragoons
1st/2nd sqdns, Baden Hussars
Baden Guard du Corps(2 squadrons)
1 Horse Artillery battery
Austrians
Division command - 7
1st Brigade - Cmd 7
1st Battalion, Kaiser Franz Regiment(No.1)
2nd Battalion, Kaiser Franz Regiment(No.1)
1st Battalion,
Reuss-Greitz Regiment(No.18)
2nd Battalion,
Reuss-Greitz Regiment(No.18)
Foot Artillery battery(2 guns)
2nd Brigade - Cmd 7
1st Battalion,
Baron Preiss Regiment(No.24)
1st Battalion,
Baron Preiss Regiment(No.24)
1st Battalion 2nd Szeckel (No.15 Grenz) regiment(line)
2nd Battalion 2nd Szeckel (No.15 Grenz) regiment(skirmish)
Foot Artillery battery(2 guns)
Cavalry Brigade - Cmd 7
1st/2nd sqdns,
Zeschwitz Curiassier(No.5)
3rd/4th sqdns,
Zeschwitz Curiassier(No.5)
1st/2nd sqdns,
Hohenzollern Chevauleger(No.2)
1 Horse Artillery battery
the Austrians started deployed(mostly in attack column) along their table edge, and my forces moved on from mine.
here is the table as set up.
 |
| 4x8 table i set up in my TV room. |
|
|
On the first turn, my entire cavalry refused to move despite the division commander yelling at them.
both infantry brigades got a double move. the Austrians moved up, except the kaiser Franz regiment, who milled in the rear areas. this would end up being indicative of the regiment, as it would never move more then 10 inches form its starting point.
On the 2nd turn the Baden cavalry brigade advanced onto the table(Finally!) and the hussars raced up the far Austrian right flank to draw off the Chevauleger. the Cuirassier flanked the woods on either side at the crest of the hill overlooking the field in which the Baden cavalry now occupied. the centers of both armies closed to musket ranged and exchanged ineffective fire. the Austrian foot batter on the centre road caught the Baden artillery unawares and routed them off the table. on the Austrian left, the Kaiser Franz regiment once again refused to advanced 1 move for that one and only time they would actually do anything. In the centre the grenz infantry and Baron Priess regiment refused to move and instead reordered their lines.
 |
| troops dispositions at the end of turn 2 |
during the 3rd turn, the Kaiser Franz regiment continued resumed their inaction. the
Reuss-Greitz regiment fared slightly better, making their way at last to the other side of the field. the Cuirassier reached the edge of the hill and saw the Baden cavalry in the distance, and decided to wait and use the hill to his advantage in the charge to come. the Garde du Corps and Baden dragoons advanced further across the field before them. The Baden hussars charged the Austrian chevauleger but were overwhelmed and retired, not to be seen again that day. in the centre, the 1st Baden infantry charged in at the grenz skirmishing before them, catching them off guard and routing them. the 2nd regiment(both battalions in attack columns) charged the 2nd battalion of the Baron Preiss regiment(in line) holding the orchard wall. despite being heavily outnumbered, the Austrians held the orchard and continued to fight. the 1st battalion of the Baron Preiss regiment charged one battalion of the 1st Baden infantry, but the Badeners held their ground.
The 4th turn began with remaining Baden cavalry advancing to the edge of the field by the road. the Austrian cuirassier raced down the hill towards the Baden position, but had misjudged the distance, giving their enemies time to react. The 2nd battalion of the 1st Baden infantry charged the grenz attack column, but much to their(and the Austrian commander's) surprise the grenz held, for now. the other battalion 1st infantry battalion once again held against the Austrian onslaught and the melee continued. the 2nd Baden infantry regiment fared much the same with the Austrians in the orchard. the Baden colonel remark " these Austrians must absolutely adore apples, for I've NEVER seen Austrians defend an orchard so vigorously!"
on the Austrian left flank, the Baden brigade commander, realizing the slow pace(indeed, he hadn't entirely decided if it WAS moving at all!) of the redeployed his formations to fire as the Austrians closed.
when the 5th turn came, the Baden cavalry sprung to life. teh dragoon colonel ordered his 2IC to counter charge with the 3rd band 4th squadrons, while he enveloped the flank with the first 2. the 3rd and 4th squadrons of Austrian Cuirasser, caught totally off guard by the brilliant maneuver, retired and the dragoon commander took shameless advantage. just after the garde du Corps charged headlong into the first 2 squadrons of cuirassier, the dragoons made a sweeping advance past the retiring squadrons and right into the flank of the other cuirassier formation. the guard du corps morale had been shaken by the brief melee, but it was to late for the Austrian cavalry, and they were run down.
 |
| centre and cavalry melee at the end of Baden phase in turn 5 |
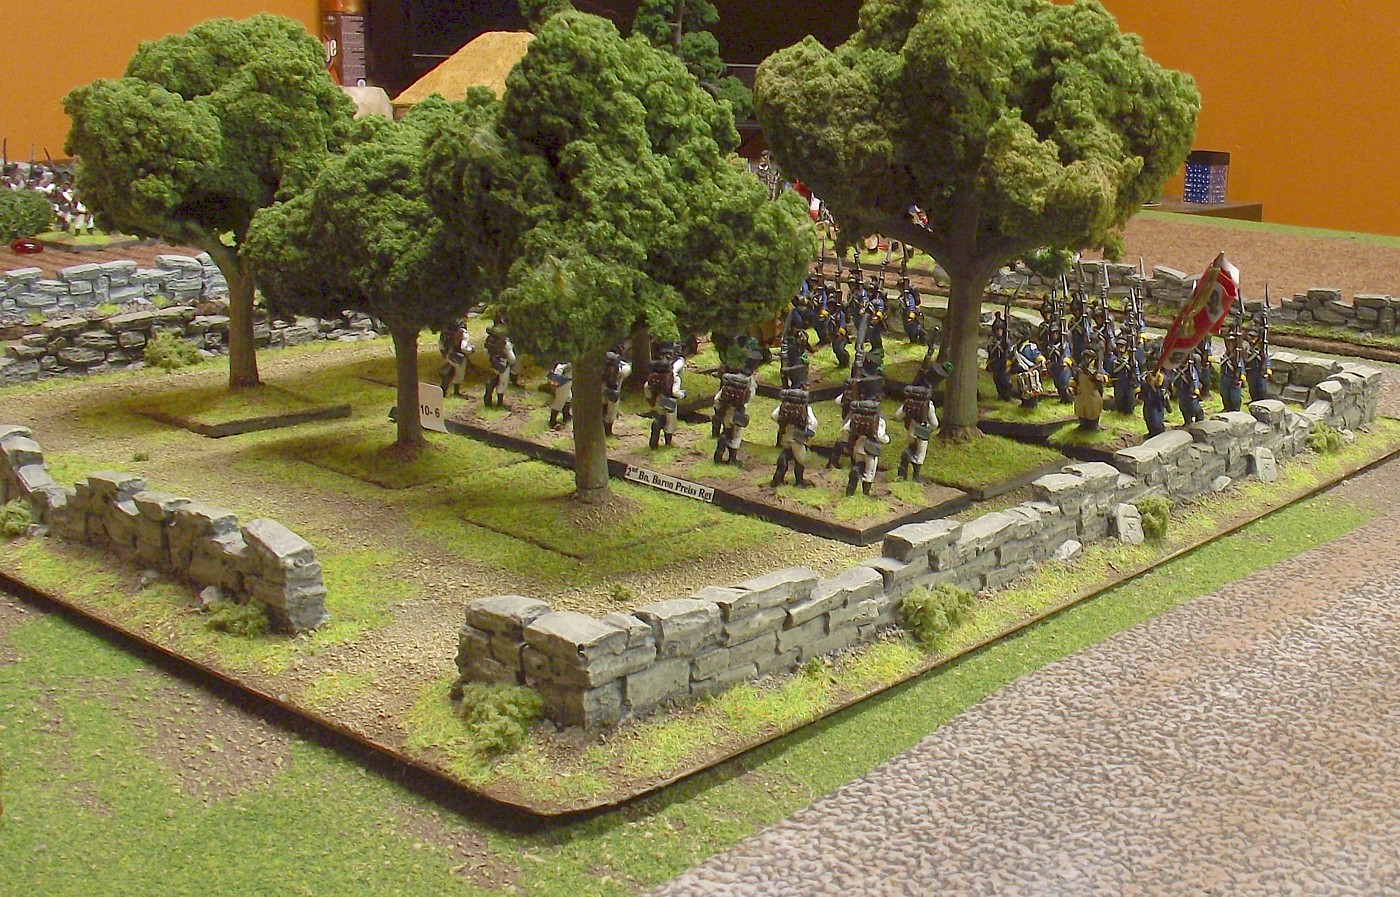
in the center, the 1st Baden infantry regiment broke the grenz column and routed the battalion of the Baron Preiss. the 2nd battalion after defending the walled orchard for 2 turns from the entire 2nd Baden regiment, finally retires. beaten but not broken, they would be ordered to withdraw before they got a chance to retake the wall.
 |
After holding for 2 turns, the 2nd battalion of the Baron Preiss
regiment retired back into the orchard |
alas, before teh kaiser Franz regiment could muster enough energy to move more then 100 meters, the signal to retreat is sounded. the brigade and overall commander could be overheard mutter about how even Hungarian regiments would have done more!
 |
| the largely uneventful Austrian left flank |
 |
| teh final disposition of the Austrian right flank |
the game took about 2 hours to play. genearlly derek(the austrian commander) rolled a little better then i did for shooting, and occasionally fore melee, but my morale saves and melee dice were genrally better. derek's luck disappeared in hte 5th turn. my cavalry got 3 moves, so it was a simple matter to maneuver the one dragoon unit into the curaissier flank before chargin home. derek's luck really turned in hte melee rolls.
all in all it was a fun game. hats off to the 2nd battalion of the Baron Preiss regiment. a line battalion standing up and holding a full regiment in attack column for 2 turns, and retiring in good order on the 3rd? I've never seen the like in an Austrian army!
And the Baden dragoons! what a spectacular finish! heroes of the battle! that roll came at a fortuitous time, and they forced one cuirassier unit to retire and outright broke the 2nd in 1 turn!!
" Extra rations for the men tonight!"